

The STEM PLAYER is a device that allows you to play, split and free any music you want, wherever you are in the world. It also allows you to control the vocals, drums, bass, and samples that make up a song and isolate them from the mix. We'll help you get the most from your STEM PLAYER right here on YM.
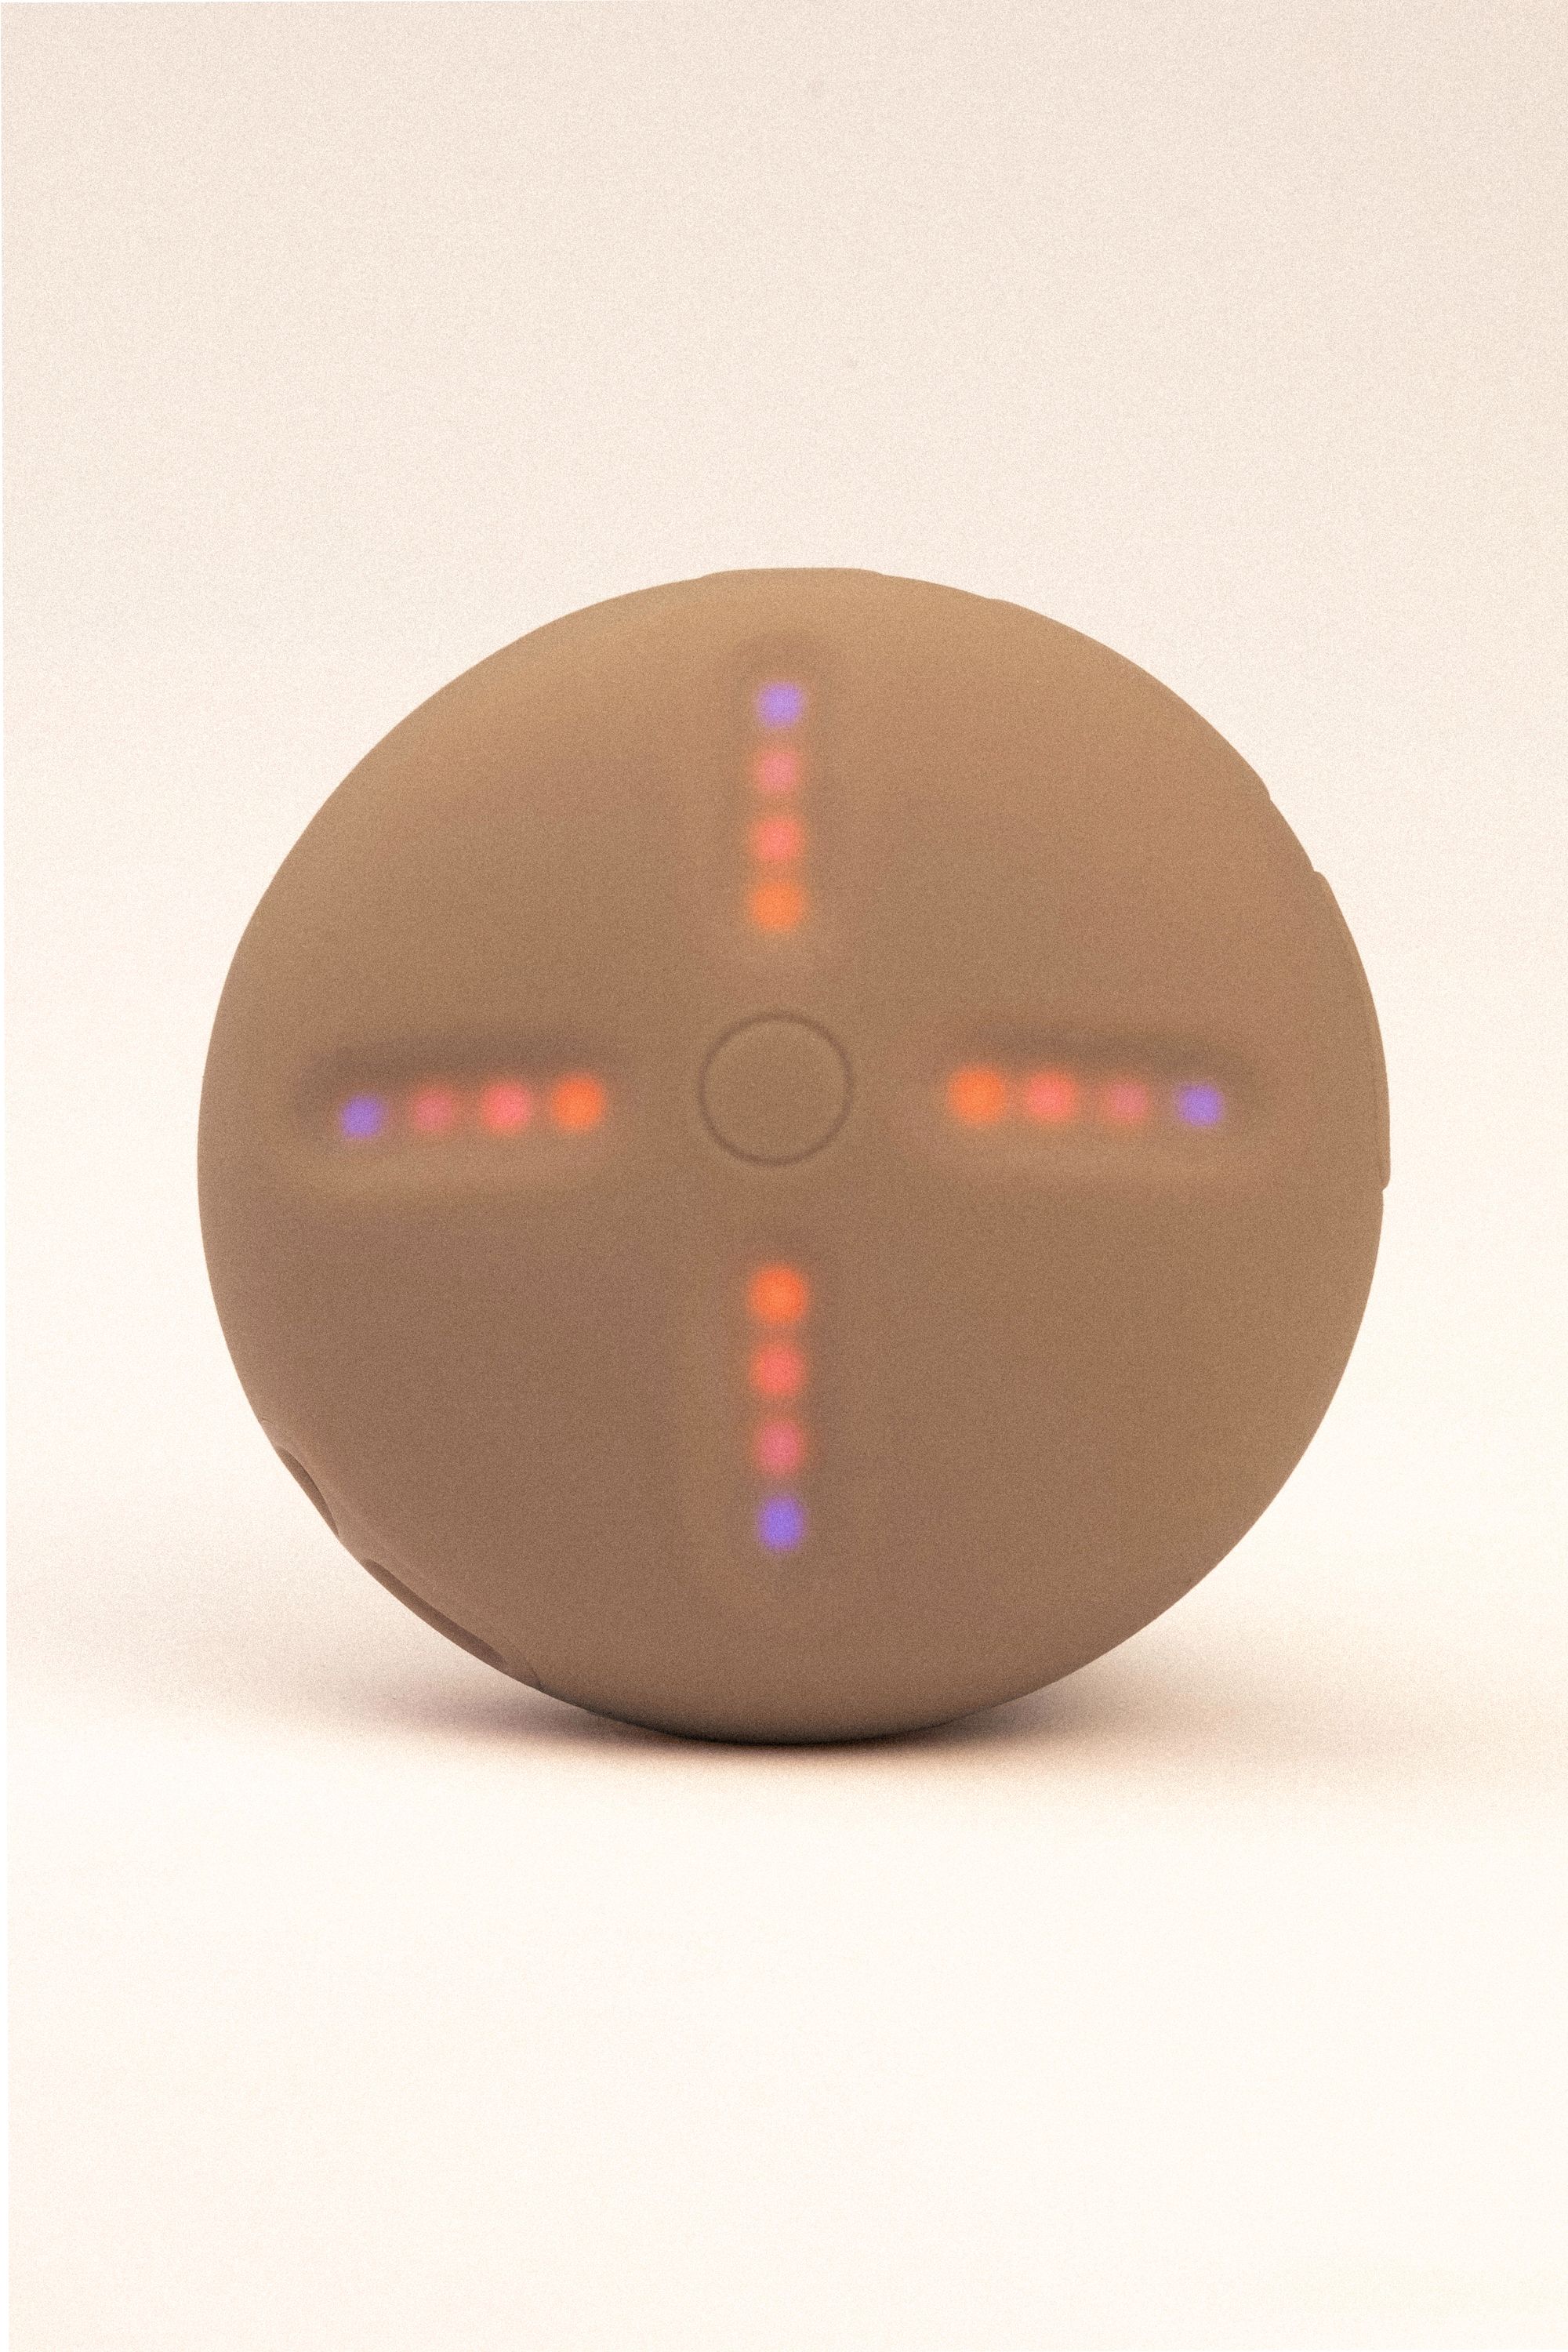
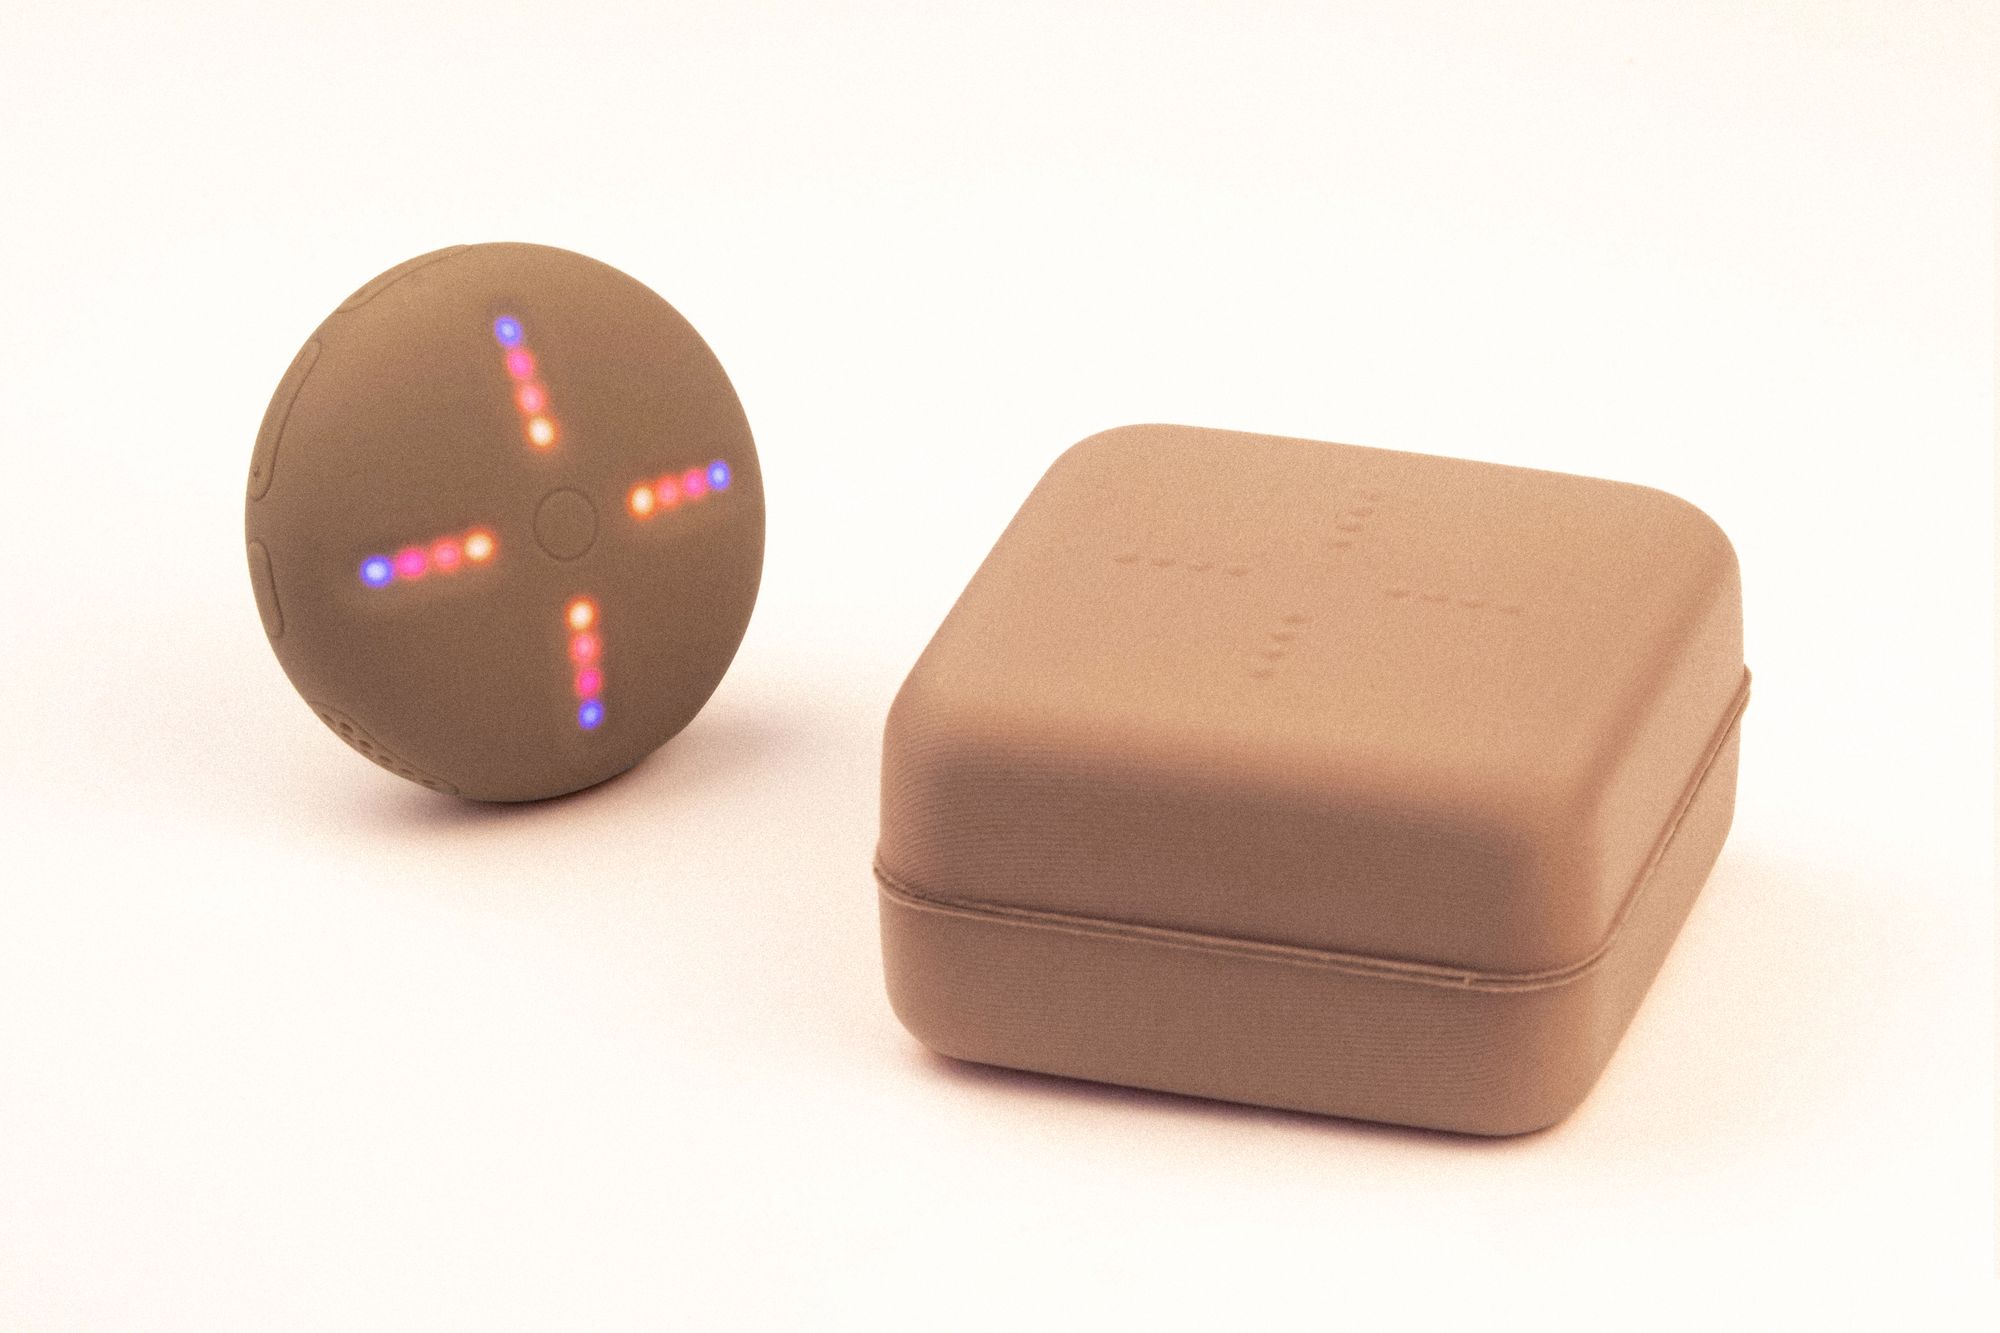
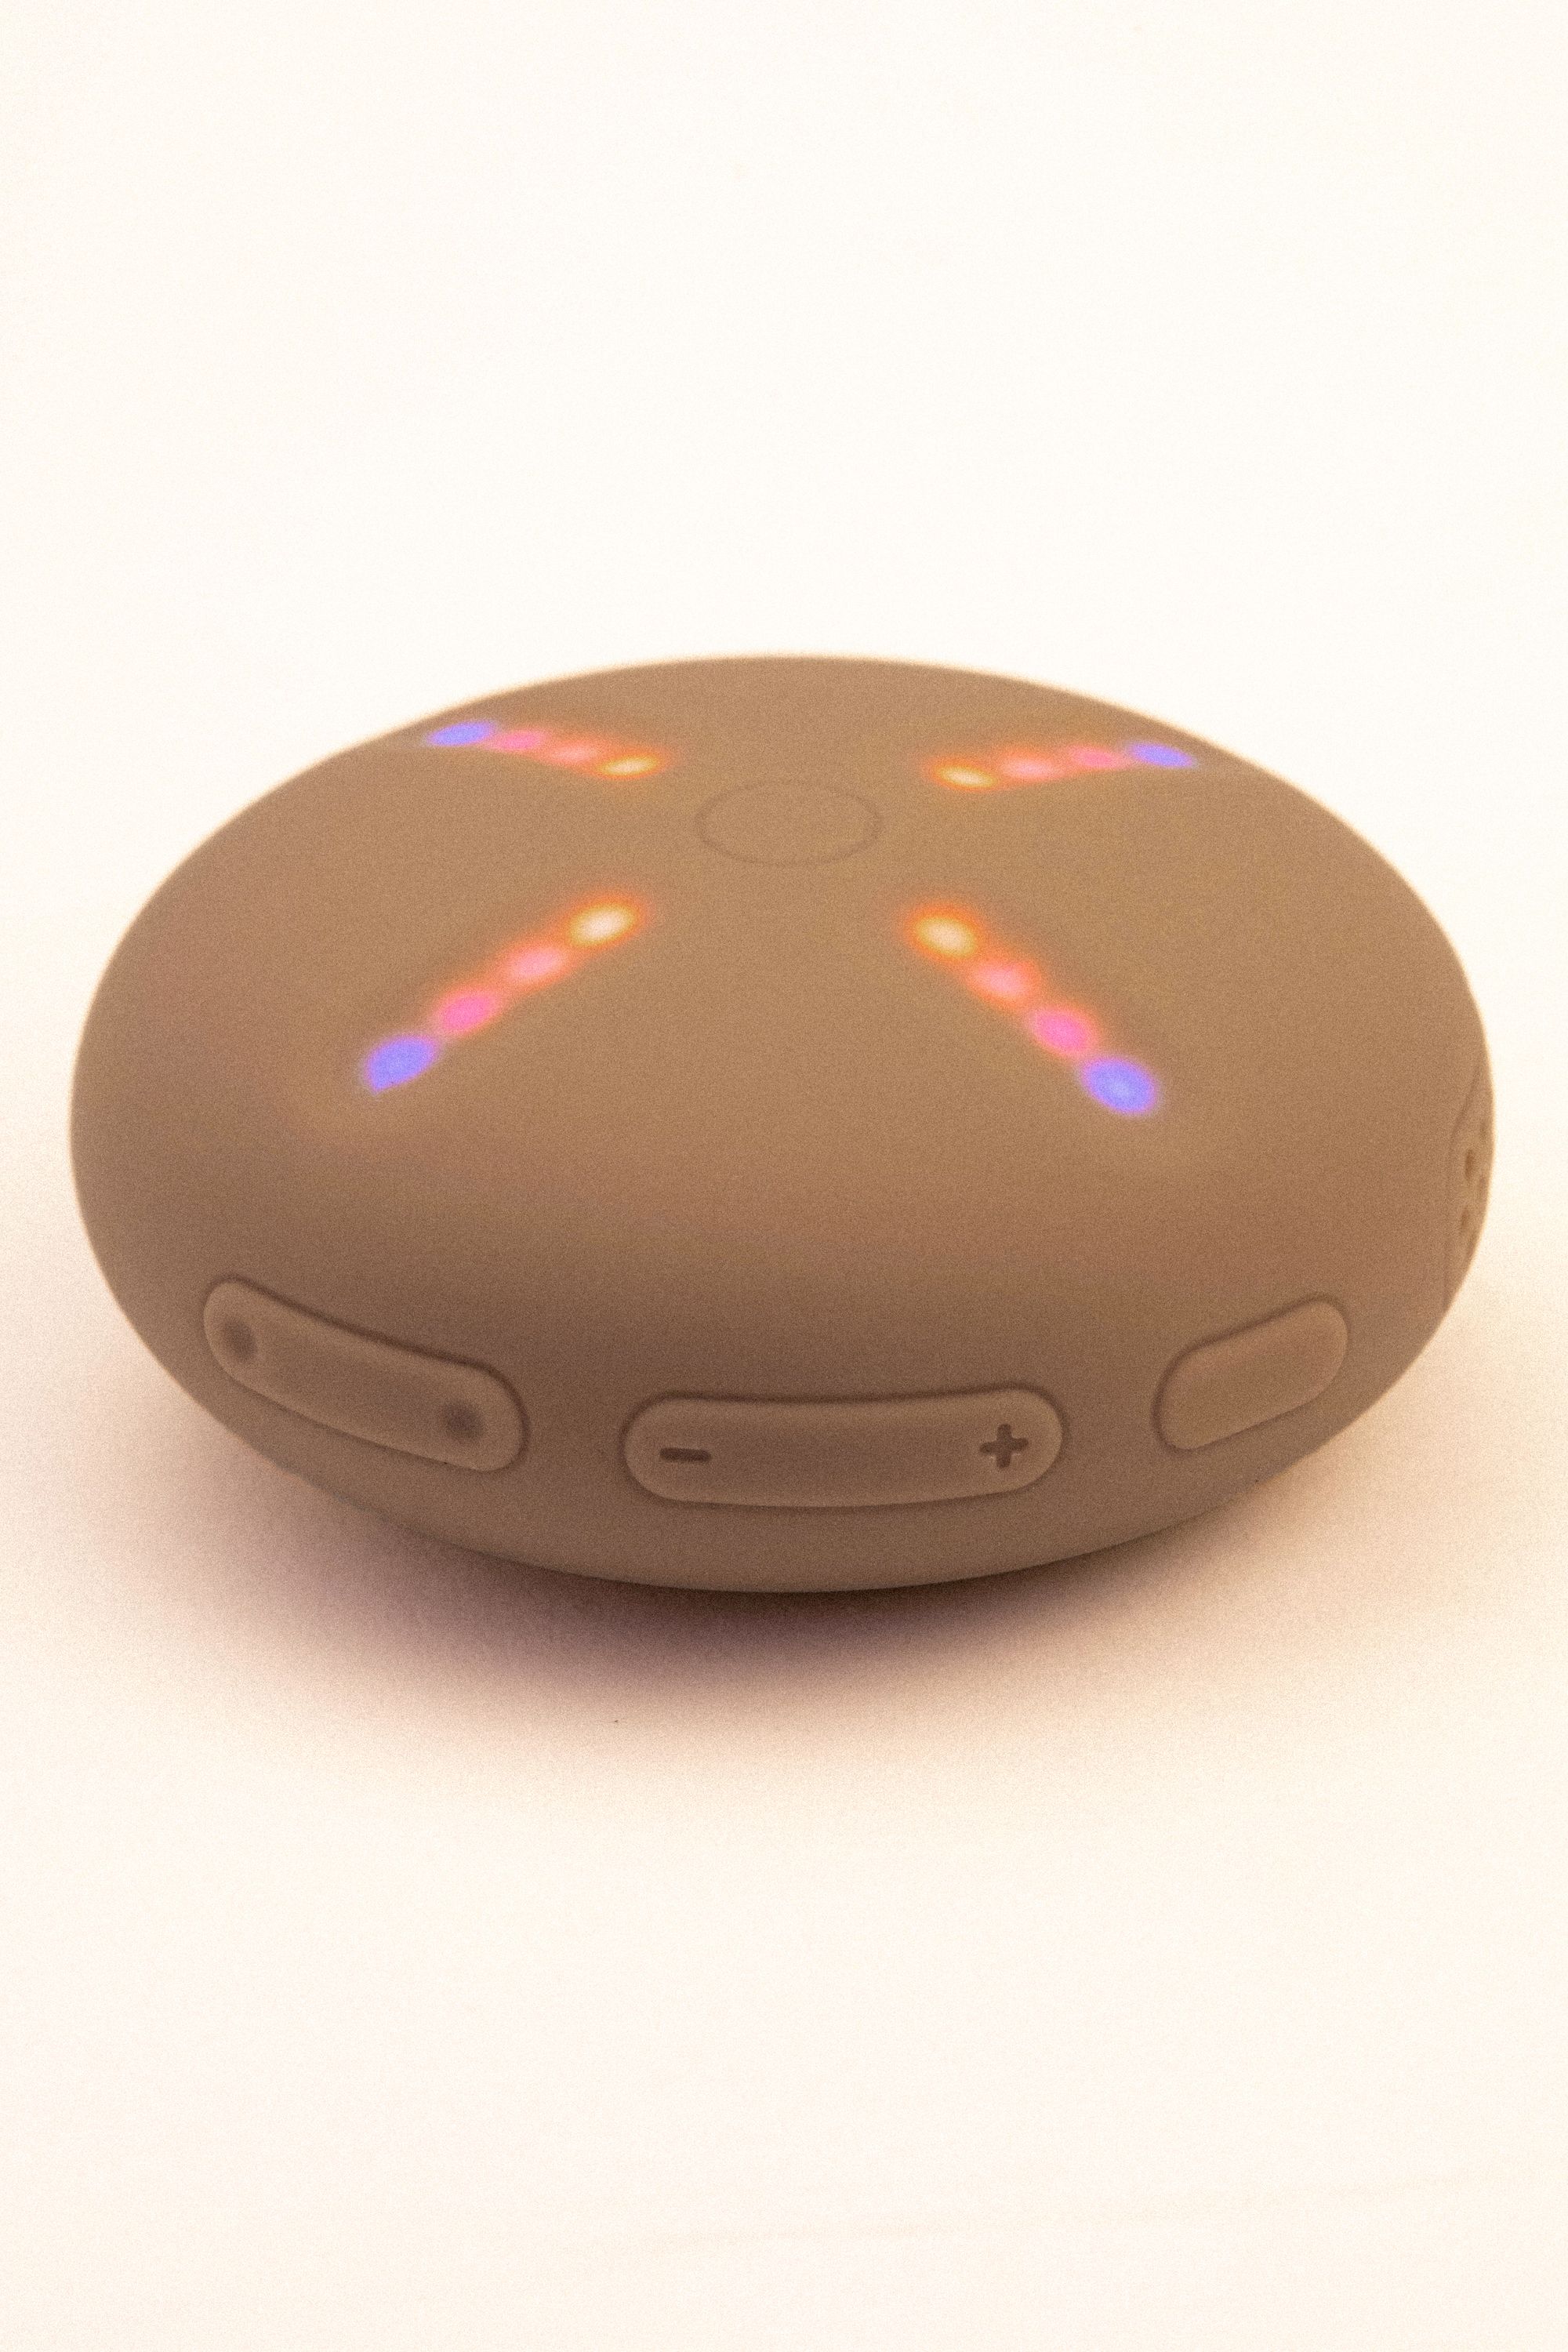
The STEM PLAYER features six buttons, which are the power/toggle, center, previous/next track and a volume rocker with '+' and '-'.

In addition to these six buttons, the STEM PLAYER also features four haptic sliders - these are used to manipulate the music in real-time.
There are also three 'menus' that the device comes with: the main/stem menu, the loops/speed menu, and the effects menu. You are taken to the main/stem menu by default when turning the device on.
While you're in the main menu, you can control the volume of each stem, change the master volume, skip tracks and control the playback of the current track.
Playback is controlled with the button in the center of the device, with one click causing the current song to pause. If the speed of the current music has been changed, or there are loops or effects active, one click of the central button will remove all effects, with a second click pausing the current song.
Master volume is changed using the '+' and '-' buttons on the volume rocker. You can change the volume of an individual stem by using the haptic sliders - slide away from the center to increase the volume, slide toward the center to decrease it. The sliders themselves control the volume of the vocals, bass, drums, and other musical elements, such as piano keys being played.

To isolate your stems, you press and hold on the outside edge of a slider - multiple stems are able to be isolated at one time.
The previous/next track buttons have multiple purposes - cycling through the tracks that are on the STEM PLAYER, fast-forwarding and rewinding songs, and changing albums. A quick press of these buttons will take you to the previous or next song, while a long press fast-forwards or rewind the current song. Holding down both of the buttons together will cycle through the albums currently stored on the player.
By holding both the central button and the power button together, you can lock the sliders, which turns off the LED lights on the face of the device and prevents you from making any accidental changes. All of the other functions of the STEM PLAYER still work while the sliders are locked. A quick press of the power button will unlock the sliders again to allow for changes.
You can also create a quick loop. This is done by pressing and holding the center button while a song is playing. If you like the sound of your loop, you can lock it in by pressing the power button, taking you to the loops and speed menu.
The loops and speed menu controls both the playback speed and loops of the current song. The four haptic sliders on the face of the STEM PLAYER are treated as two large connected sliders in this menu - one vertical slider and one horizontal slider with the power button at the top of the device.
The horizontal slider is used to control the playback speed, with the device featuring four separate speeds. The right-hand side of the horizontal slider allows you to select these speeds while playing the song forwards, with the light on the outermost edge representing the fastest speed. The left-hand side of the slider will allow you to select these speeds while also playing the song backward.

The vertical slider controls your loop, working from bottom to top. Each LED on the slider represents a set number of bars the STEM PLAYER will loop - one light lit represents 0.25 bars, with the number doubling as you go up the slider. All eight of the lights lit represents no current loop being active.
The previous and next buttons can be used to adjust a loop in small increments to make it sound smoother. Pressing the central button will clear all speed adjustments and loops - if the song playing is playing at normal speed with no active loop, pressing this button will take you back to the main menu.
Heartless by Kanye West - Stem Player edit by MatthewWilson798 pic.twitter.com/rGQyKCdOBJ
— STEM PLAYER (@stemplayer) December 17, 2021
You can access the effects menu by holding the central button and '+' on the volume rocker while a song is playing. Like in the loops and speed menu, the four sliders function as though they are two large connected sliders with the power button at the top of the device.
The vertical slider controls the effect of your choice, with eight separate effects to choose from, like reverbs and fades. The horizontal slider represents the intensity of the effect, with the LED on the outermost right of the slider being the most intense effect on the song and the opposite side removing the effect altogether. When finished with the effects, you can leave this menu with a quick press of the central button.
The STEM PLAYER also allows you to record your hard work, which is done by holding down the '+' button on the volume rocker while a song is playing. A red line will appear, which signifies that the player has begun recording - after that, you're free to do what you want until you stop recording by holding the same button down - the default recording time is 60 seconds. Up to four tracks can be stored on the player at one time, and they can be accessed by cycling through your albums (holding down both the previous and next buttons).
Believe What I Say by Kanye West - Stem Player edit by @majormusic pic.twitter.com/bCy35n4Er4
— STEM PLAYER (@stemplayer) January 5, 2022
You can also pair your STEM PLAYER with a Bluetooth device by pressing and holding both the '+' and '-' buttons - you'll know the device is in pairing mode if all of the LEDs have turned blue. When the device has paired, a light will flow across the sliders.
All song management on the STEM PLAYER is done through the official website. Once you have connected your device, you can add and remove songs, as well as update the firmware. The STEM PLAYER supports sound files of various formats but can also use YouTube links.

Ready to get to grips with your STEM PLAYER? Let us know by showcasing your mixes on social media - and be sure to tag both YM and STEM PLAYER.
You can also enter our giveaway - as a celebration of our partnership with STEM PLAYER, we are proud to give away twenty STEM PLAYERS split between Instagram and Twitter (ten for each platform). To enter, follow the YEEZY MAFIA and STEM PLAYER pages on both Instagram and Twitter, and be sure to like the giveaway post, leave a comment, tag a friend and save the post. You can also get a bonus entry to the giveaway if you repost the annoucement to your story.
Hurry - entries close soon, with the winners set to be announced on Friday 4th February 2022.
For more updates on all things YEEZY, as well as future STEM PLAYER endeavors, be sure to keep it locked to YM.
Feature image taken by @nelsonlikesmusic via Instagram


